In my recent ‘Getting started with Oracle Cloud VMware Solution (OVCS)’ post; Getting Started With Oracle Cloud VMware Solution (OCVS) – Networking Configuration we familiarized ourselves with the OCVS networking configuration, including NSX-T. Now that we have a better understanding of how the networking is configured within the environment, we can start to look at connecting our workloads running within our OCVS SDDC to other Oracle Cloud Infrastructure (OCI) Services.
Posts in this series:
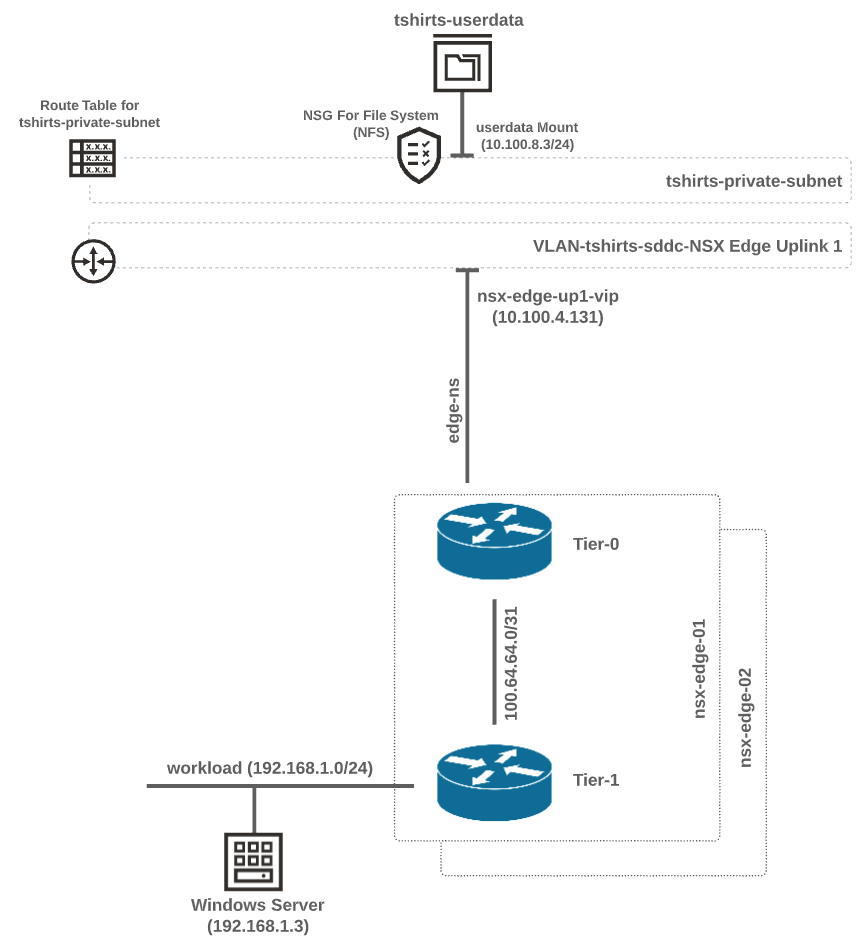
In this blog post were are going to deploy a Windows Server into our SDDC and connect it to an OCI File System that will be used to store files and folders for our users. This is a very simple example chosen to illustrate how easy it is to connect OVCS workloads to OCI services. This is a high-level diagram of what we are going to be configuring.
The first thing we need to do is create our workload in our SDDC. The process of creating virtual machines within the OCVS SDDC is the same as it is in your on-premises environment, so I am not going to document the process here. I simply created a virtual machine, uploaded an ISO onto the vSAN datastore, and booted the virtual machine from the ISO to install Window Server.
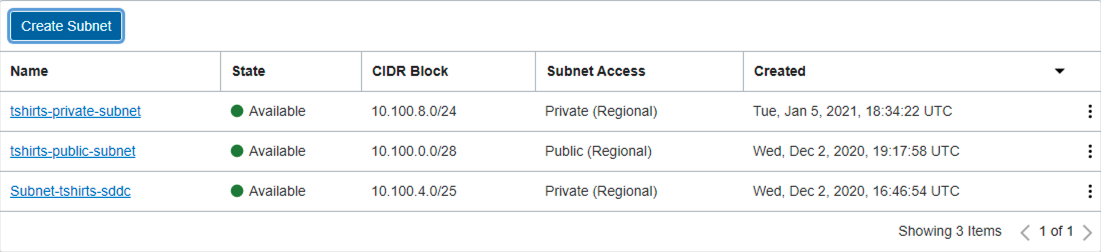
Next, we need to create a private subnet that will be used by the OCI File System service. In theory, we could connect it to the public subnet, however, keeping security in mind, I’d recommend using a private subnet for any workloads that do not require access from the outside world.
Create A Route Table
Next, our private subnet needs a Route table so the subnet knows how to get to the Windows Server on the workload (overlay) network.
The Windows Server is on a network that is not part of our VCN, as such, we need to create a route so that traffic that needs to go from the private subnet (10.100.8.0/24) to the Windows Server (192.168.1.3) knows that to get to the server, it needs to send the traffic to the NSX Edge vIP. Once the traffic reaches the NSX Tier-0 router via the Edge vIP, it is routed to the Windows server through the Tier-1 router.
If you wanted to, you could use an existing Route Table (I.e Default Route Table for <vcn name>) for this, however, I prefer to be more granular and give this subnet its own unique Route Table.
During the creating of the Route Table Rules, we are going to need a couple of pieces of information. First, we need the workload (overlay) network CIDR block (I used 192.168.1.0/24). Second, we need the NSX Edge virtual IP Address. The quickest way to find the Edge vIP is the following:
Now we have all of the information we need to create our Route Table and Rules.
The Route Table will be created and is ready for editing.
Your Route Rule should look something like this, except of course with your own NSX Edge vIP address and workload network CIDR Block. This rule directs any traffic that wants to go to your workload network to the NSX Edge vIP address.
Next, we need to create a Network Security Group (NSG) which we will apply to our File System Mount Target. The NSG will allow traffic we specify to flow from the NSX Edge Uplink 1 VLAN to the File System we will create shortly. Security Lists can also be used to allow traffic to flow.
Why use Network Security Groups instead of Security Lists?
Security lists are associated with subnets. If you use security lists to set up your security rules, those rules will apply to all VNICs in the subnet. Unlike security list rules, NSGs apply only to resource VNICs you add to the NSG. So the NSG’s allow more granularity by applying the rules directly at the VNIC level.
NOTE: The Source CIDR I specified is the CIDR for my workload (overlay) network. Your workload CIDR Block maybe different.
| Direction | Source or Destination | Protocol | Ports |
|---|---|---|---|
| Ingress | Source Type: CIDR Source: 192.168.1.0/24 |
TCP | Source Port Range: ALL Destination Port Range: 111,2048-2050 |
| Ingress | Source Type: CIDR Source: 192.168.1.0/24 |
UDP | Source Port Range: ALL Destination Port Range: 111,2048 |
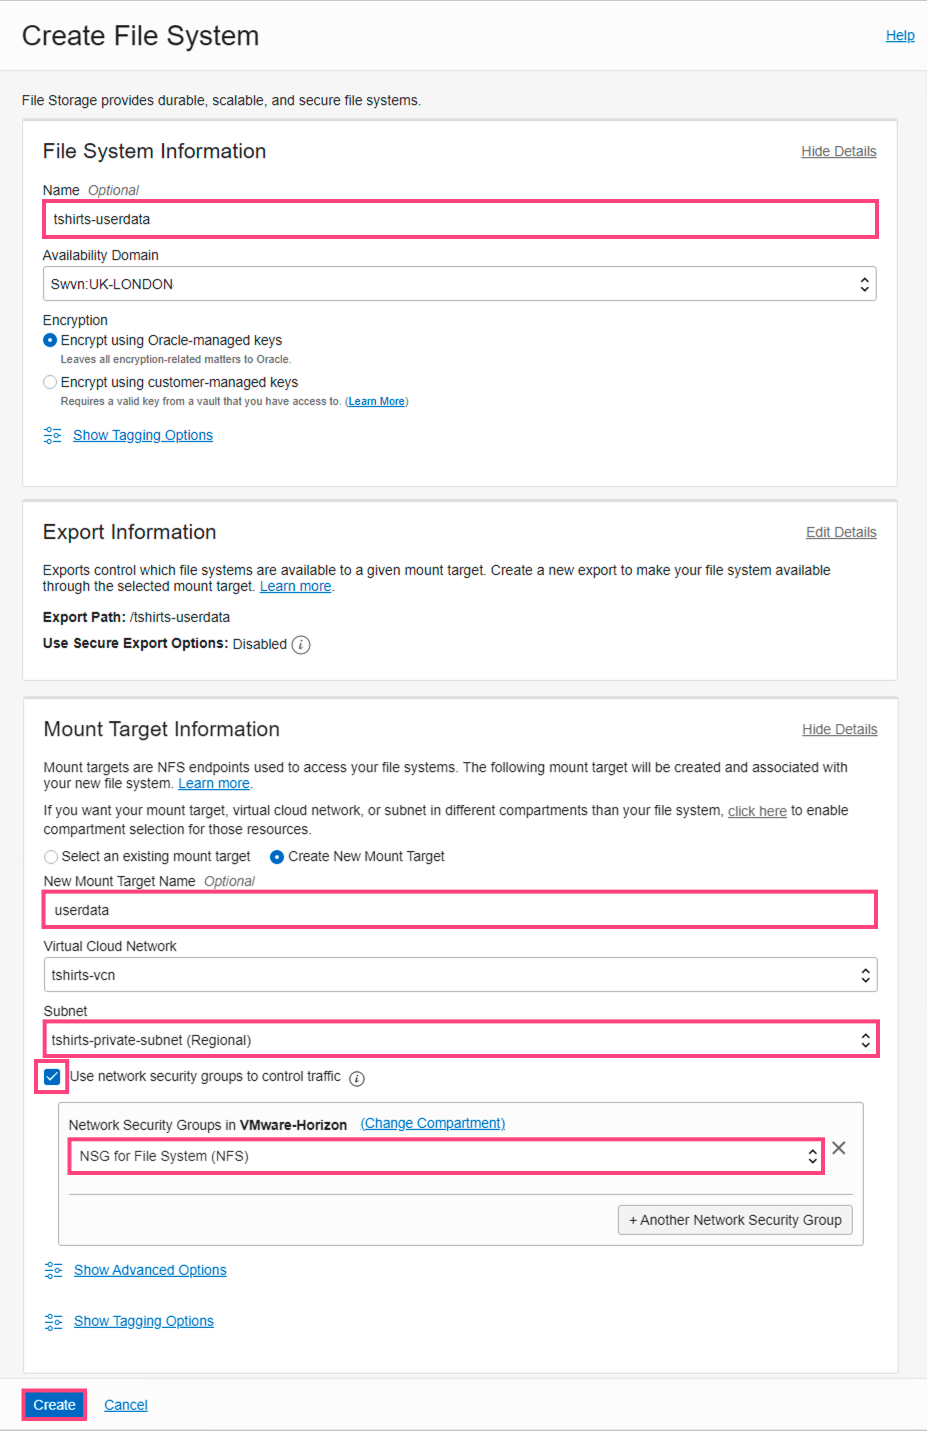
Next, we need to create a File System that will be mounted into our Windows Server virtual machine and used to store users’ files and folders.
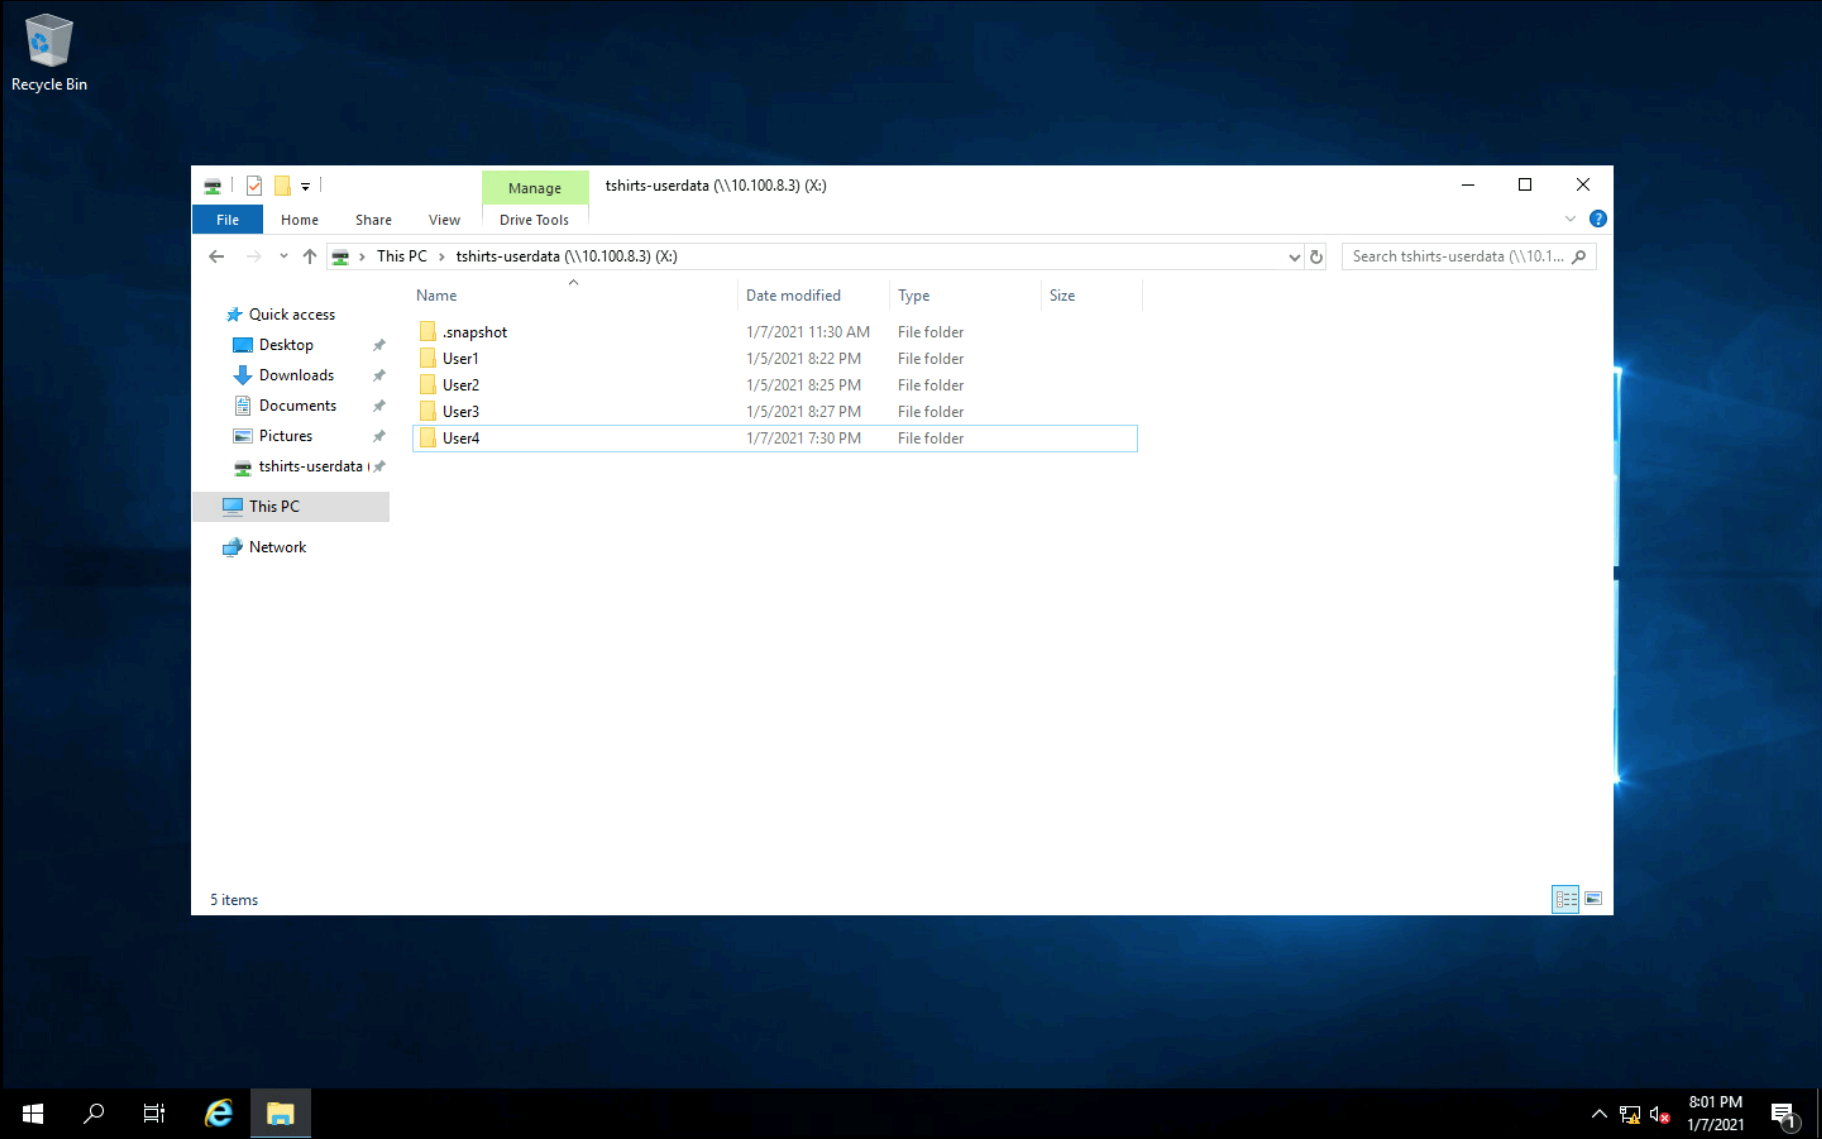
With our new File System created and our Network Security Group applied to our Target Mount, we can now mount our File System on our Windows Server virtual machine. As this is a Windows task, I am not going to document the steps in this post. You can follow the steps posted here.
There are two pieces of information you will need to mount your File System; your Mount Target IP Address and Export Path.
Even though this a fairly simple example, I think it nicely illustrates the simplicity of how OCVS workloads can interact with native Oracle Cloud services.
Referring back to our high-level diagram, we can see all of the components we have deployed for our Windows server within our SDDC to communicate with our File System within OCI. We can now follow the traffic flow between the servers which might help make things a little clearer.
In the next post in this ‘Getting Started with Oracle Cloud VMware Solution (OCVS)’ series, we’ll be looking at external connectivity. Connecting our on-premises vSphere environment to our OCVS SDDC and workloads.
Another VMworld is upon us!!! Sadly, it's only virtual again this year. However, that does…
As part of my recent move to Google, I'm working on quickly getting up to…
I am delighted to announce the next chapter in my career. Today is my first…
In episode thirteen of The VCDX Podcast, I am joined by two special guests who…
In my recent ‘Getting started with Oracle Cloud VMware Solution (OVCS)’ post; Getting Started With…
In my recent ‘Getting started with Oracle Cloud VMware Solution (OVCS)’ post; Getting Started With…