Posted by Simon Long May 28, 2010
Using vMA As Your ESXi Syslog Server

This is something I did a while ago, but it came to my attention that people didn't; a) Know that it's recommended to use a syslog server with ESXi b) You could use an application built in to vMA called vilogger.
Although it is stated in The Architecture of VMware ESXi…..
Because the in-memory file system does not persist when the power is shut down, log files do not survive a reboot. ESXi has the ability to configure a remote syslog server, enabling you to save all log information on an external system.
…..it is not a well known fact. So that is partly the reason for writing the post. The other reason is to introduce you to vilogger, which is part of the vMA. Of course you can use which ever syslog server you wish, if you plan to use your own, be sure to checkout Managing VMware ESXi page #68 to view the configuration steps.
I'm not going to take you through the steps of installing vMA, nor am I going to tell you all about what the vMA (vSphere Manage Assistant) does. If you want to read more about that please find the relevant links in the Sources section at the bottom of the page. But I am going to take you through the steps I took to use vMA as my ESXi syslog server.
First of all, download the vMA from here. Import and configure it using the steps in the vSphere Management Assistant Guide
Changing vMA localtime settings to avoid incorrect log timestamps
When vMA collects the logs from your ESXi Host, sometimes the logs have the ESXi Host timestamp and sometimes they will have the vMA Localtime timestamp. I'm not exactly sure why this happens, but it does. (You may or may not know that ESXi uses UTC as its timezone when it timestamps the logs. You can read more about that here. VMware have told me this cannot be changed.)
So to get around the issue of differing timestamps in your collected logs we need to change the localtime on the vMA to UTC. This can be done using the following steps:
- sudo rm /etc/localtime
- sudo ln -s /usr/share/zoneinfo/UTC /etc/localtime
If you use NTP to sync your environments time, it might be worth adding in your ntp servers onto the vMA.
- sudo nano /etc/ntp.conf
- Add in your ntp servers under the heading: # Use public servers from the pool.ntp.org project.
- Configure ntpd to start on reboot: sudo /sbin/chkconfig ntpd on
- Restart ntpd: sudo /sbin/service ntpd restart
- Make sure your ntp servers are reachable: sudo ntpq -p
Whilst your at it you could change your keyboard for those of you outside the US.
- sudo vi /etc/sysconfig/keyboard
- change KEYTABLES=”us” to use the keyboard you have, for example: KEYTABLES="en"
Adding a second Hard Disk to store your logs
Because of the amount of ESXi Hosts I have to manage I decided that I would add a second Virtual Disk to house my logs. You may not need to do this if you only have 1 or two Hosts.
- Add a second Hard Disk to the vMA VM
- PowerOn vMA
- Login using vi-admin
- Format the new Disk with the following command: fdisk /dev/sdb
- Use the n command to create a new partition
- Use the p command to make the new partition a primary partition
- Press 1 to make it partition #1
- Use the default for the First Cylinder
- Use the default for the Last Cylinder
- Use the p command to verify the partition table
- Use the w command to write the partition table to the hard disk
- Press Enter a couple of times to confirm it's finished and return to the command prompt
- Now we need to format the partition using the follow command: sudo mkfs -t ext3 /dev/sdb1
Now we have our new disk ready, we now need to mount it.
- Edit /etc/fstab using the following command: nano /etc/fstab
- Enter in the following line: /dev/sdb1 /var/log/syslog ext3 defaults,auto 1 2
- Use Cntrl+X then Y to save the file
- Next: cd /var/log/ then mkdir syslog
- Change the owner of the /syslog dir: sudo chown vi-admin:root /var/log/syslog
- finally mount /var/log/syslog to mount the disk
Ok, now our new Disk is mounted, we need to tell the vilogger application to store your logfiles there. The default location is /var/log/vmware so we need to change it.
- Edit the vilogger config file using: nano /etc/vmware/viconfig/vilogdefaults.xml (or /etc/vmware/vMA/vMA.conf in v4.1)
- Change the file to match this: <location>/var/log/syslog</location> (This appears twice, change both)
- Use Cntrl+X then Y to save the file
- Restart vilogger by: service vmware-vilogd restart
Now vilogger is set to store your ESXi logfiles onto your new disk.
Configure vMA to collect your logs
Next we configure vMA and vilogger to collect your ESXi logfiles.
- Connect your ESXi Host to vMA using the following command: sudo vifp addserver <FQDN of ESXi Host>
- Enter the Root Password for the Host
- Once the Host has been added you can double check by running the following command: vifp listservers
- Now set vilogger to start collecting your logs: vilogger enable –server <FQDN of ESXi Host> –numrotation 20 –maxfilesize 10 –collectionperiod 10
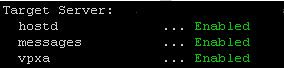
You will see the above displayed, showing that vilogger is now collecting logs from your Host.
Values –numrotation 20 –maxfilesize 10 –collectionperiod 10 can be changed to suit your needs. If you just run the vilogger –help command you will see what options and values are available.
Viewing your logs
Now your vMA is collecting your logs you can view them by: dir /var/log/syslog/<FQDN of Host> You can view your logs in real time if you wish, read more about there here.
- An example: tail -f /var/log/syslog/<FQDN of Host>/vpxa.log
Sources:
