As part of my new role at VMware, I recently got access to Oracle Cloud VMware Solution (OCVS as it’ll be called from now on) to check out their solution and begin to understand how it all works. If you aren’t familiar with OCVS, you can read more about it here; Oracle Cloud VMware Solution
As part of my discovery and learning process, I thought I would try and share some of my thoughts and findings as I go about learning this new, cool, solution.
Posts in this series:
By default, after deployment, the OCVS SDDC is not available directly via the internet, which means my first task is to deploy a bastion host that will be used to enable external access into the Oracle Cloud environment. While the process isn’t complicated, I thought I’d document the process step-by-step, to make it easier for others in the future. I used this official Oracle Cloud Bastion Host document as a guide throughout the process. (Note: A bastion host may not be required if you are using an Oracle FastConnect or an IPSec VPN to securely connect to the Oracle Cloud environment.)
When it comes to bastion hosts, there are many options for you to choose from. In this post, I’ll only document how to deploy a Linux virtual machine which can then be used to provide an SSH Tunnel, or used to install Apache Guacamole onto. If you really wanted to, you could deploy a Windows server and RDP to that instead. The type of bastion host you use is entirely up to you.
Below is a simple diagram of how the environment will be configured at the end of this post. I’ll have a single virtual server (bastion host) that is available on the internet via a public IP address.
Configuration Steps
Prerequisites
- Access to OCVS
- It is assumed that you already have access to the OCVS console and access to deploy in a compartment. (A compartment is a collection of related resources, such as cloud networks, compute instances or block volumes that can be accessed only by those groups that have been given permission by an administrator in your organization. More Info)
- Create SSH Keys
- Oracle recommends using SSH keys for SSH access instead of using passwords. When we deploy the bastion host instance (virtual machine), we are asked for a public SSH key as part of the wizard rather than for a root password. I followed this article to help me create my SSH Keys: PuTTYgen – Key Generator for PuTTY on Windows
Prepare the Virtual Cloud Networking
First, we will create the Virtual Cloud Network. (A virtual cloud network (VCN) is a customizable and private network in Oracle Cloud Infrastructure. … This includes assigning your own private IP address space, creating subnets, route tables, and configuring stateful firewalls. More Info)
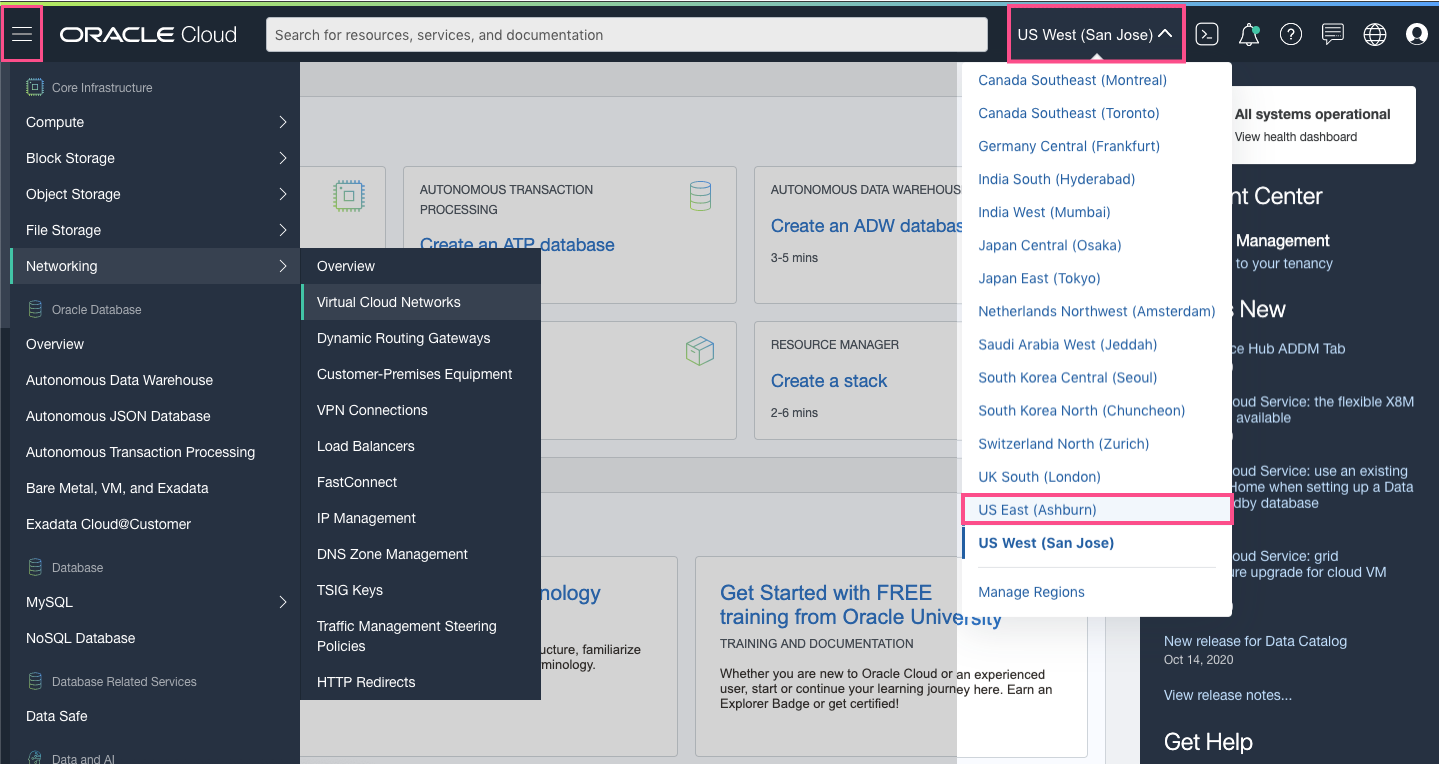
- Login to the OCVS console
- Select the correct Region that you wish to deploy the OCVS SDDC into. (In my example I am using US East (Ashburn)
- Click on the burger icon at the top left of the screen to display the menu
- Select Network > Virtual Cloud Networking
- Click Create VCN (This will open the Create a Virtual Cloud Network wizard)
- Name the VCN (I named mine tshirts-vcn as we are a T-Shirt company)
- Select the correct compartment
- Enter the CIDR block that will be used within the VCN. (As we’ll be deploying the OCVS SDDC into this CIDR block, I decided to use 10.100.0.0/16. Work with your networking team to figure out which CIDR you should use)
- Click Create VCN to complete the configuration
When a VCN is created it also creates a
Default Security List and a
Default Route Table.
- A Security List is a virtual firewall that is used to Accept/Deny traffic. By default, the Default Security List allows the following traffic:
- Ingress – TCP Port 22 (used for SSH) and ICMP
- Egress – All traffic
- The Default Route Table is created without any rules. We’ll add a rule later to direct all outbound traffic out of the Internet Gateway.
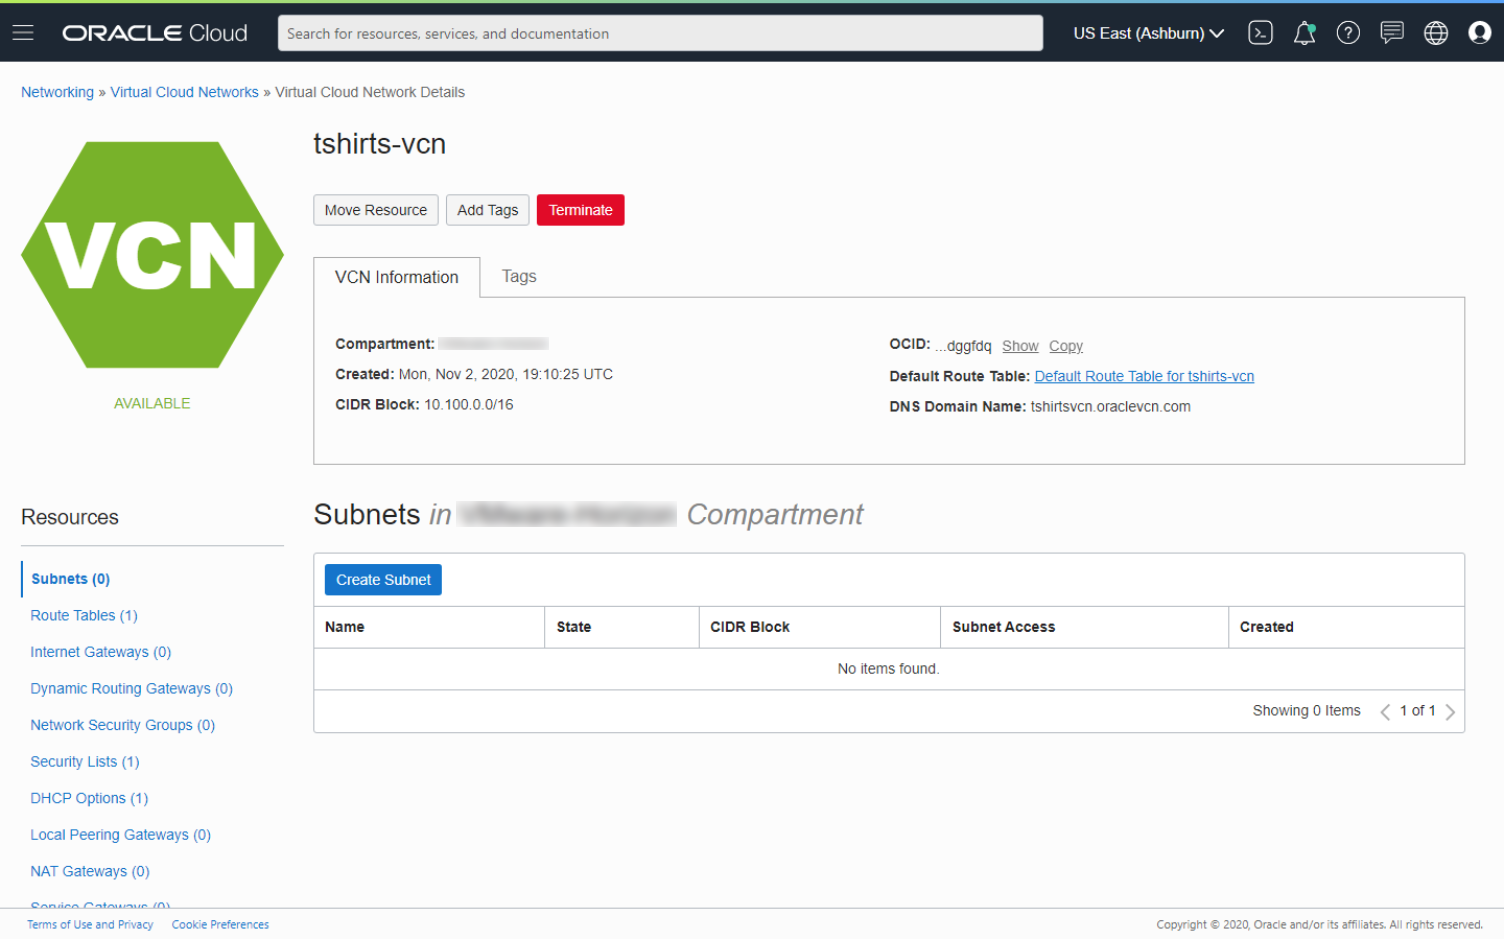
Next, we’ll create the public-facing subnet.
- Click Create Subnet
- Name the subnet (I named mine tshirts-public-subnet)
- Make sure the correct compartment is selected
- Enter the CIDR block that will be used for the public subnet. (As this subnet will only be used for the bastion host(s), I decided to use 10.100.0.0/28)
- Select Default Route Table for <vcn name> for the Route Table
- Ensure Public Subnet is selected (This allows us to assign a public IP address)
- Select Default Security List for <vcn name> to associate the subnet to the Security List
- Click Create Subnet to complete the configuration
While the subnet is provisioning, we can create our Internet Gateway. An internet gateway is an optional virtual router you can add to your VCN to enable both ingress (incoming) and egress (outgoing) connectivity to the internet.
- Click Internet Gateways
- Click Create Internet Gateway
- Name the Internet Gateway (I named mine tshirts-igw)
- Make sure the correct compartment is selected
- Click Create Internet Gateway to complete the configuration
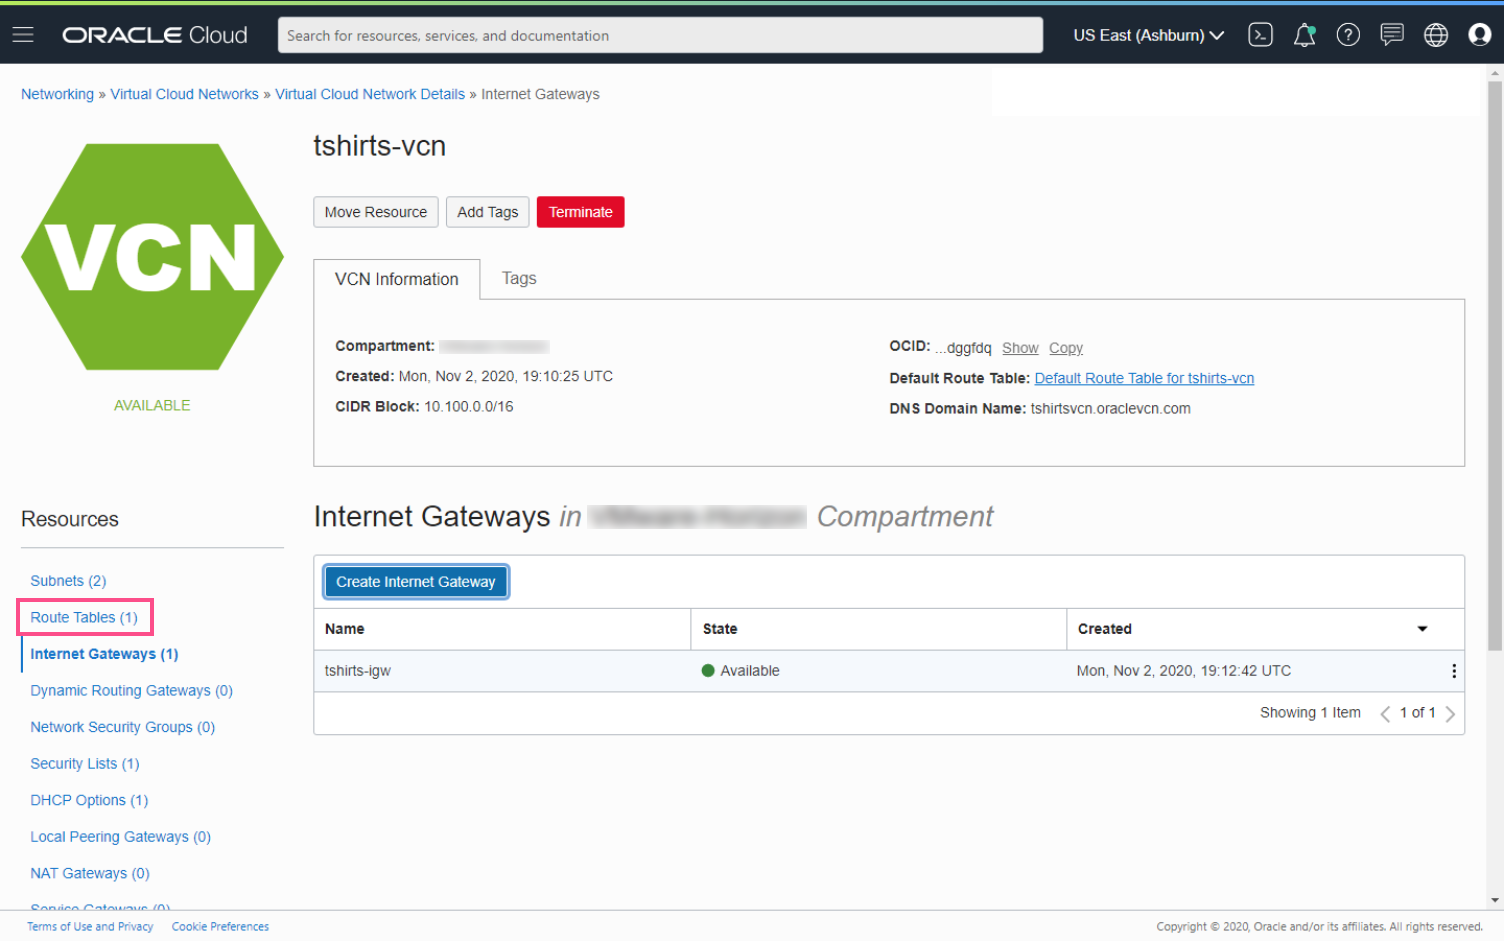
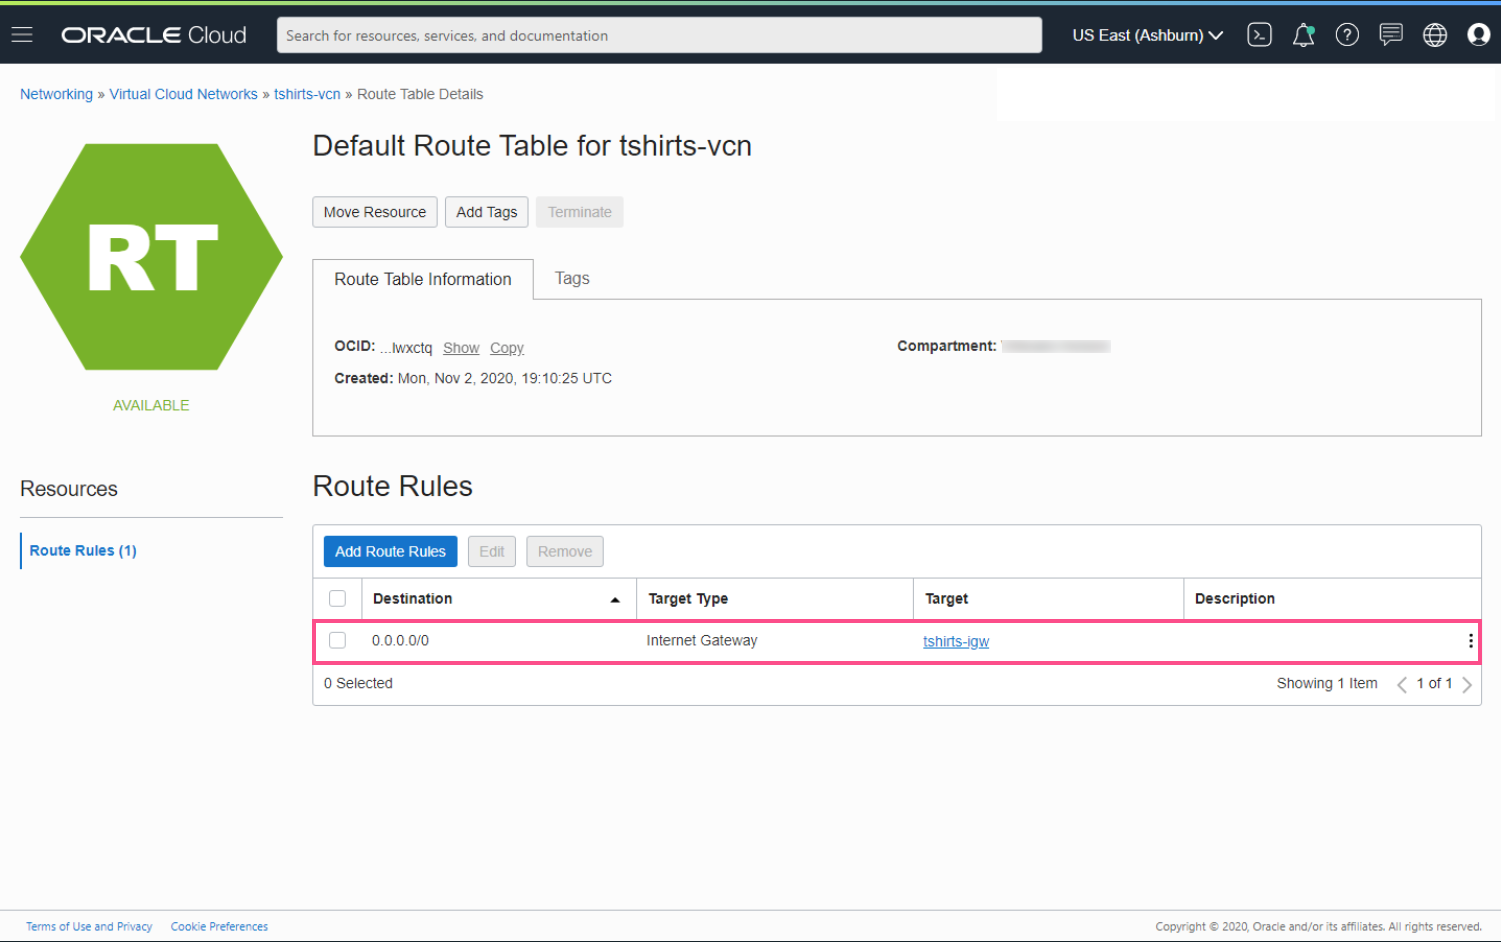
Now we need to create a Default Gateway to allow traffic out of the Internet Gateway.
- Click Route Tables
- Click Default Route Table for <vcn name>
- Click Add Route Rules
- For Target Type, select Internet Gateway from the dropdown menu
- Enter 0.0.0.0/0 as the Destination CIDR Block
- For Target Internet Gateway, select your Intenet Gateway from the dropdown menu
- Click Add Route Rules
Deploying The Bastion Host
Now that we have our networking configured and ready, we can deploy our virtual server that will be used as our bastion host.
- Click on the burger icon at the top left of the screen to display the menu
- Select Compute > Instances
- Click Create Instance
- Name the instance (I named mine tshirts-jump-01)
- Make sure the correct compartment is selected
- Select the Availability Domain on which to deploy the instance
- Select Change Image and select the image you wish to deploy (I used CENTOS 7)
- Select Change Shape and select the shape you wish to deploy (I selected the smallest shape)
- Select your Virtual Cloud Network from the dropdown
- Select your Public Subnet from the dropdown
- Select Paste Public Key
- Paste in your Public Key
- Click Create to complete the instance configuration
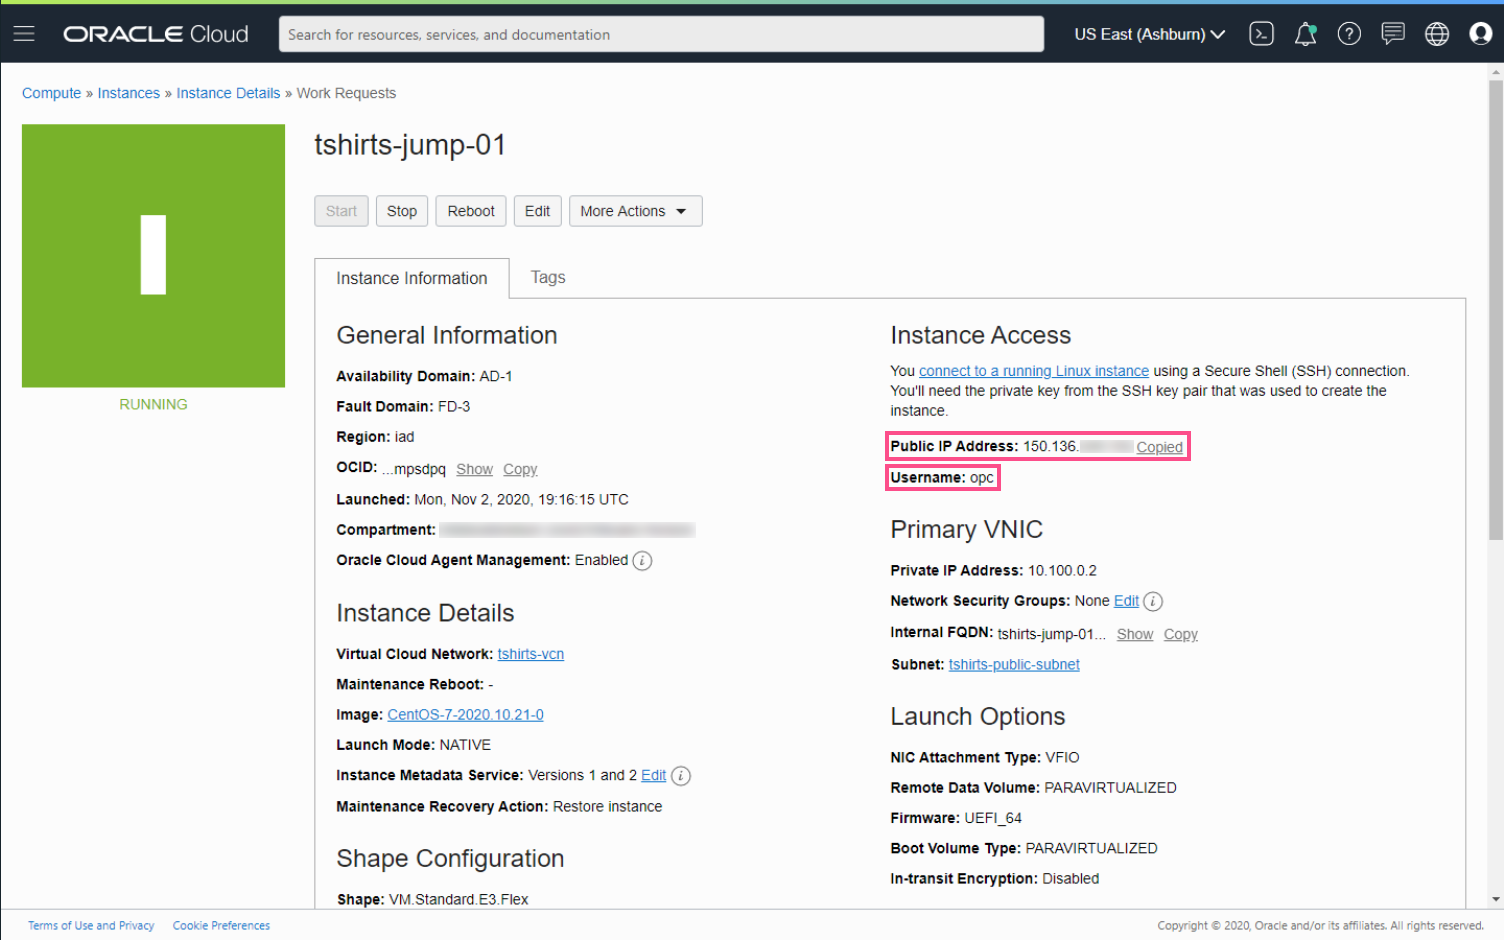
Once the instance has been provisioned, we can now see all of the instance configuration information. We now need to copy the
Username and
Public IP address that we can use to connect to the Bastion host.
- Open your SSH client of choice
- ssh -i <path to your privatekey.ppk> <username>@<public IP address> Example: ssh -i “C:\Users\Simon\My Documents\tshirts-jump-01-private-key.ppk opc@150.136.x.x
You should be automatically connected and logged into your newly deployed Bastion host.
Next Steps….
Now we have external access to our Oracle Cloud environment, the next part in our ‘Getting Started” series is Deploying The SDDC With HCX.
View Comments